Setting up Liferay 7 is straight forward if we follow some of the basic steps as defined below. In this tutorials we'll see how we can setup Liferay 7 in our local machine for Liferay 7 DXP Installation.
Environment
Liferay IDE Milestone 3.0.1 M2
Liferay CE Portal Tomcat 7 GA3
JDK 8
MySql 5.7
Once you are done with downloading the above files, extract the tomcat and liferay ide to the desired place or extract them as shown below and create a workspace for eclipse let's say "eclipseWorkspace". [Not to be confused with workspace of liferay 7].
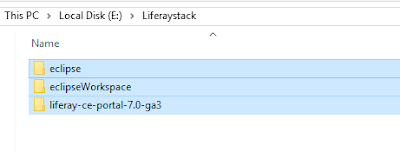
Start your liferay eclipse ide, eclipse will prompt you to give your eclipse workspace folder, give the complete path of the "eclipseWorkspace" folder in prompt. then click ok. now the liferay eclipse IDE will start.
Step 1: Setting up Tomcat in Liferay Eclipse IDE
click on the "click this link to create new server" in the server tab as shown in the image below.
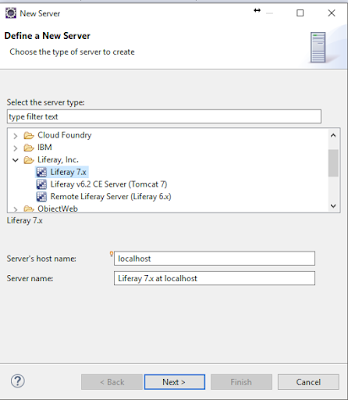
Select the liferay tomcat version as "Liferay 7.x" then click next. Give the path of the extracted tomcat server as shown in the figure then click finish.
Step 2 : Configuring Database In Liferay 7
Lets start our Tomcat server which we configured in the eclipse. it will take a while for the tomcat server to start. Visit localhost:8080 from your favorite browser.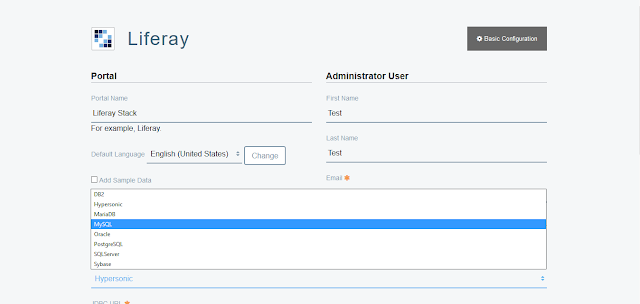
Here you can configure your database, site name administrator configuration, we need to specify the database name which already created, database URL and credentials.
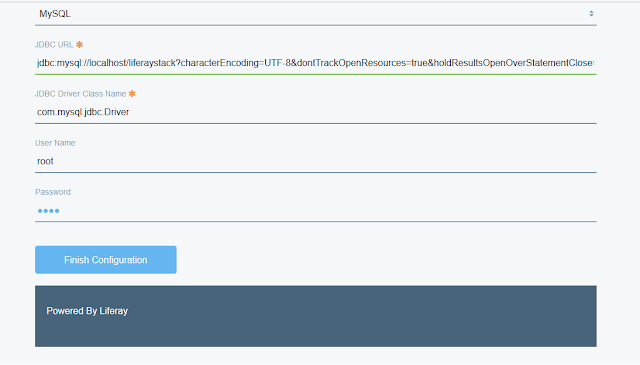
After providing the required information click on "Finish Configuration". It will ask you to restart the portal. Your Liferay Tomcat is ready with Eclipse!
Step 3 : Creating Workspace In Liferay 7
Select the 'New Liferay Workspace Project' option from the Liferay Wizard menu as shown below.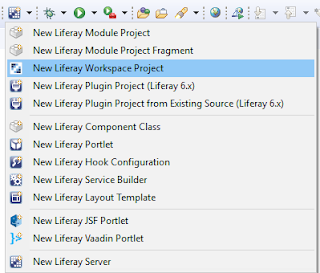
Provide the liferay workspace name, i am giving 'LiferayWorkspace' in my machine and click on finish.
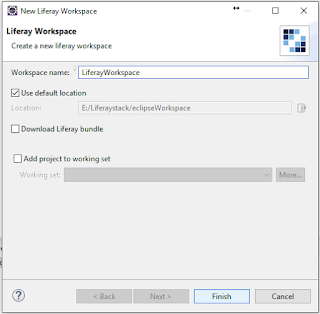
That's all, a new liferay workspace will be created. Using This Workspace we can create different modules such as portlets, theme, layout, activators etc, I will be covering them in future blogs.


Wow awesome bro great start...
ReplyDelete